The copier should already be in your list of installed printers if you have a Penn-owned computer. If it is not, or if you're on a personal computer, please follow the directions at /bio_computing/copiertips to get connected.
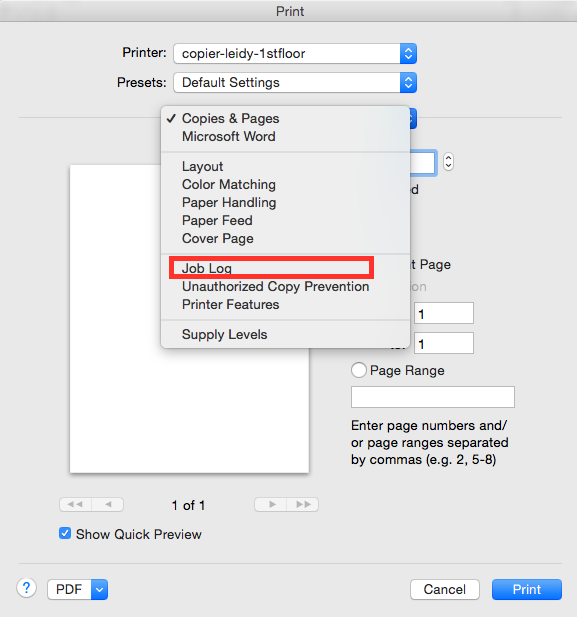
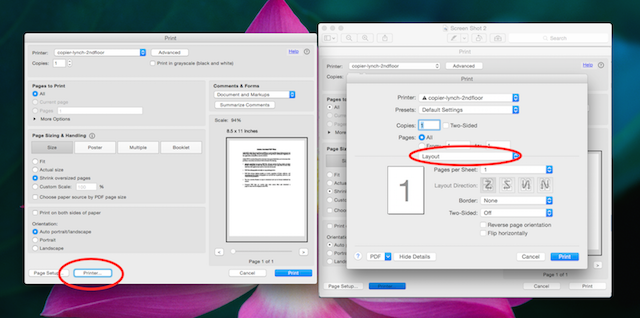
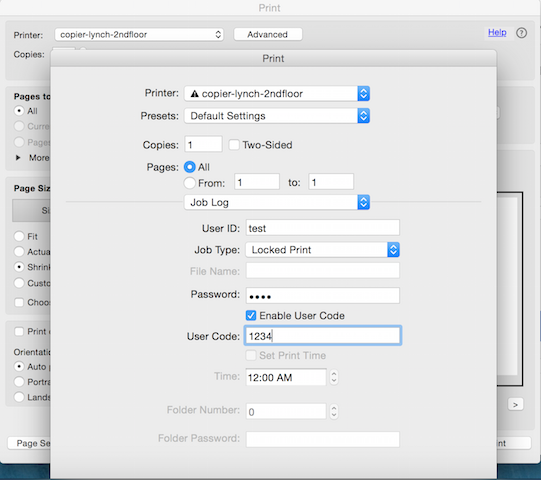
1. After you have selected the Copier as your printer, locate Job Log in the drop down menu. The screenshots below show the location in Microsoft Word and Adobe Acrobat.
Microsoft Word
If on macOS Ventura:
Select the > to expand Printer Options and select the i icon.

Adobe Acrobat
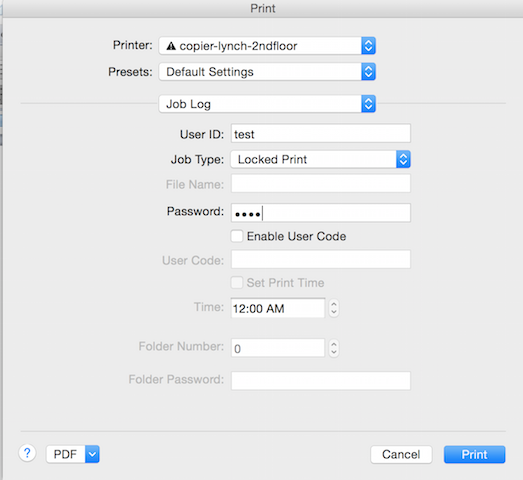
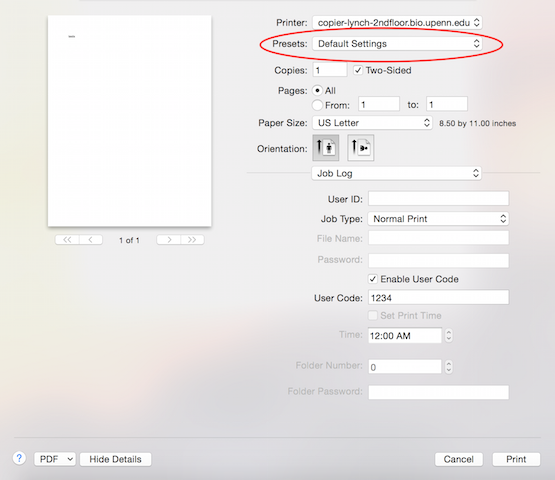
2. Put your PennKey in User ID, under Job Type, select Locked Print, and put your copier code in both the Password and User Code boxes. Make sure you check "Enable User Code."

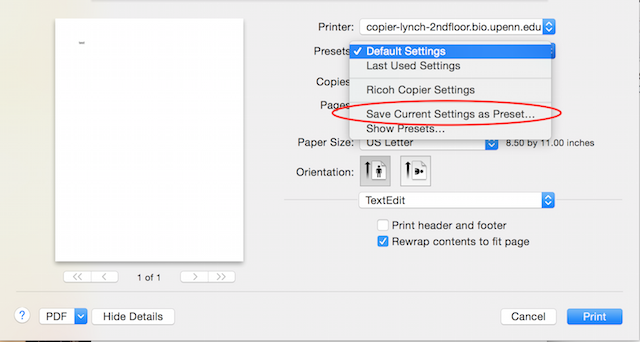
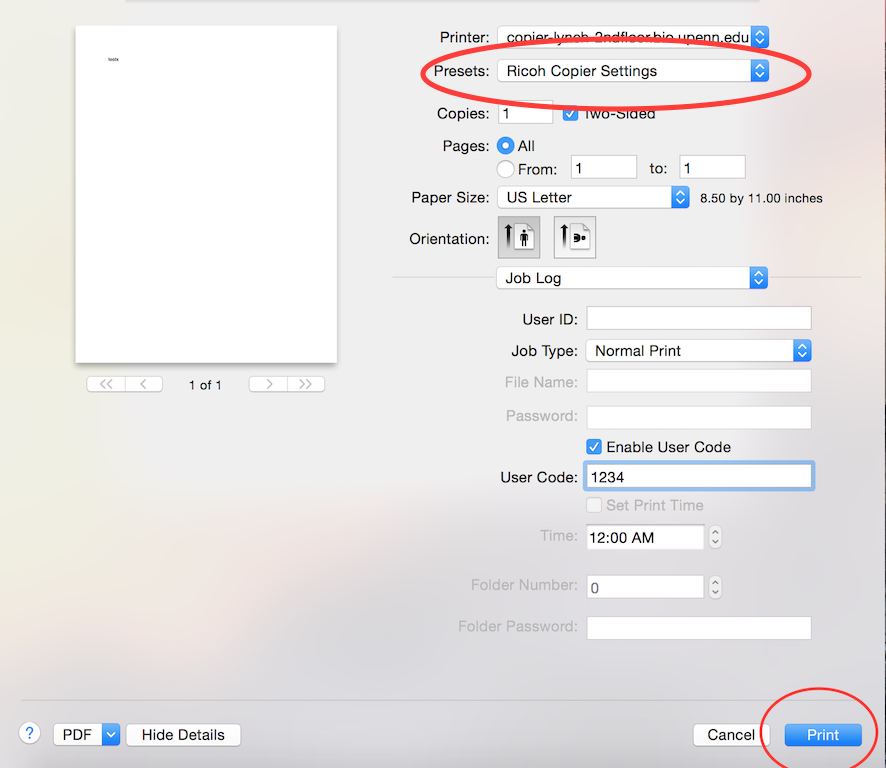
4. To save these as a preset so you don't have to insert your User Code every time, go back and select the drop down menu next to Presets:
5. Select Save Current Settings as Preset...:
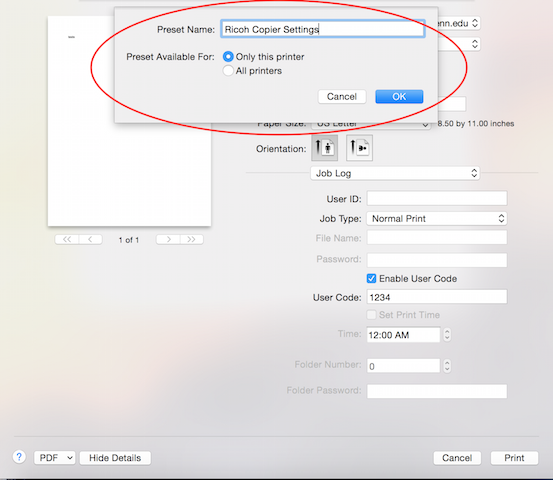
6. Name the preset and select Preset Available for: Only this printer:
7. Now click print. When printing to the Ricoh Copier, make sure that your preset you just created is selected:
8. When you are at the copier, select printer. If an option for Quick Print Release is on the screen, select this one instead:

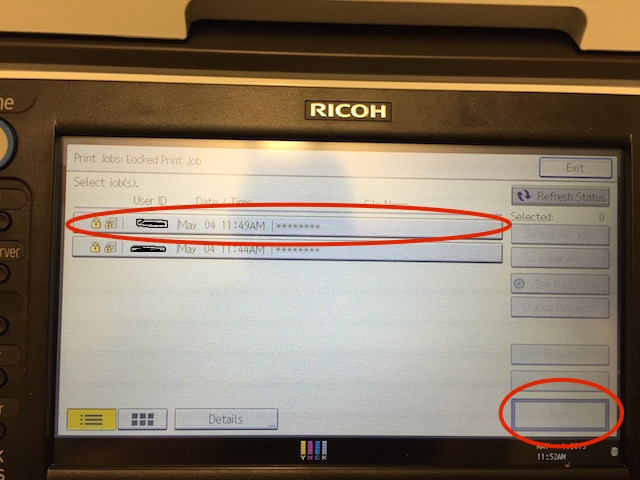
9. Select Locked print job:

10. Select your job and click print. Your PennKey will show up under User ID so you know which job is yours.